Locations
Manually-defined (Static)

Jim Buitt
Last Update hace un año
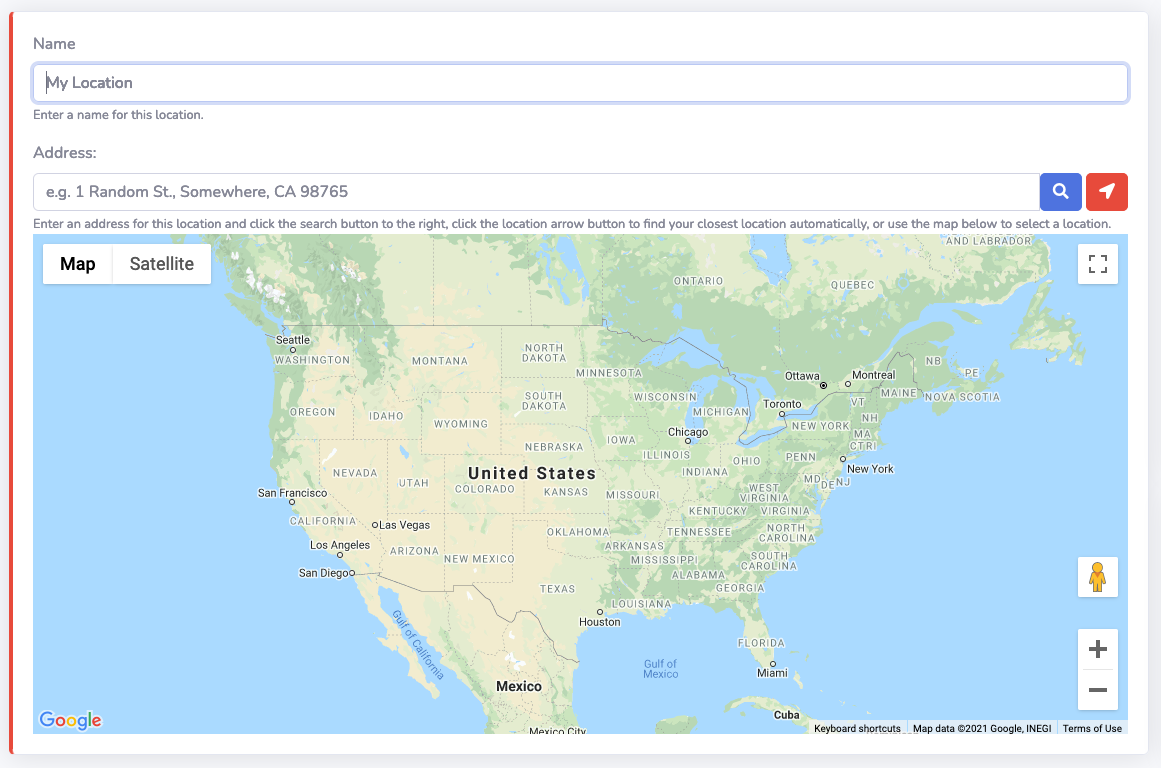
WxNotify uses the term "Location" to refer to the physical areas for where you want to be notified. When creating a new Location, you are presented with a text box to enter a location and a Google Map. To choose a Location, you have three options:
1. Enter an address, zip code, or latitude/longitude coordinates and click the blue magnifying glass icon,
2. Click the red arrow icon to have your browser automatically attempt to determine your location, or
3. Use the Google map to zoom, pan, and/or click on a desired location.
When you create or edit a Location, behind the scenes WxNotify is obtaining information about the location, such as the location's:
* Latitude & Longitude
* County Code (e.g. ILC031)
* Forecast Zone (e.g. ILZ103)
* Weather Forecast Office Code responsible for issuing products for the county/forecast zone. (LOT)
This information is used to determine whether an Alert's Location should be considered when a new product arrives to WxNotify. For short-fuse warnings, such as Tornado, Severe Thunderstorm, and Flash Flood Warnings, you will only be notified if your latitude & longitude falls within the warning polygon. For other types of products, it will either use your county code, forecast zone, or Weather Forecast Office code.
WxNotify subscribers can create up to ten (10) Locations. This allow subscribers to notify not only themselves, but any family and friends that would benefit from receiving severe weather alerts.
Traccar Locations (dynamic)
As of May 20th, 2023, WxNotify integrated Traccar into the service as a Beta feature. With the use of a free iOS or Android app, WxNotify users can now send real-time location information back to WxNotify, and the service can use that information to notify them of weather affecting that specific location. Users can also specify the frequency of how often they wish to send their location to WxNotify, however sending location too often will result in shortened battery life. (most users are usually fine with sending their location once or twice a day)
To get started using Dynamic Traccar Locations in WxNotify, download the iOS or Android Traccar app. Once the app is installed, you will need to change a few settings:
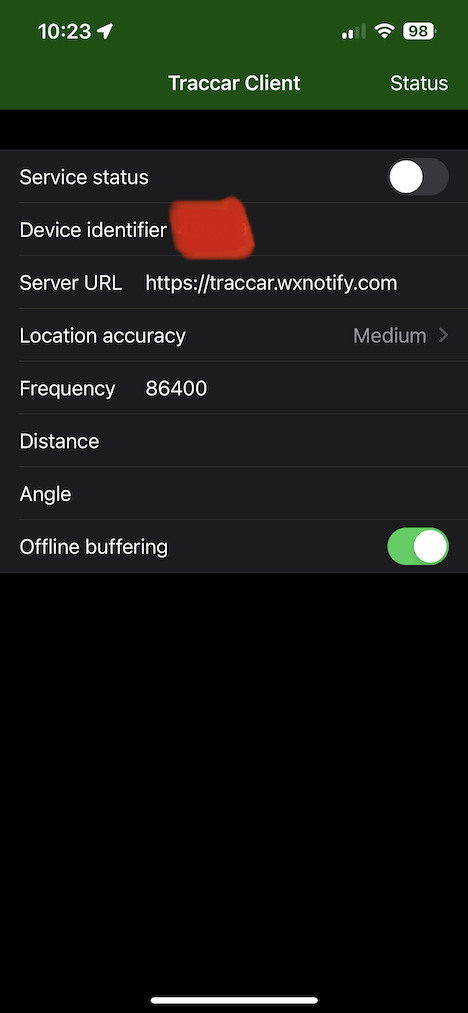
For now, leave the Service Status toggled in the Off position, we will come back to this in a moment. Please enter https://traccar.wxnotify.com for the Server URL. Location accuracy can be left on "Medium". For the Frequency, most users will want to enter 86400 (1 day) or 43200 (12 hours) but can be set to a smaller value to specify more frequent location updates. Again, sending your location more often will keep WxNotify more up to date with your location, but will result in reduced battery life. Values for Distance, Angle, and Offline buffering may all be left alone.
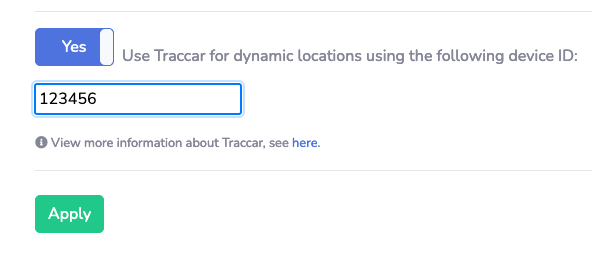
Next, you will need to sign into your WxNotify account and navigate to the Settings page. Once there, scroll down to the bottom and toggle the switch for "Use Traccar for dynamic locations using the following device ID". In the text box, enter the 6-digit device ID obtained from the Traccar app on your phone and click Apply.
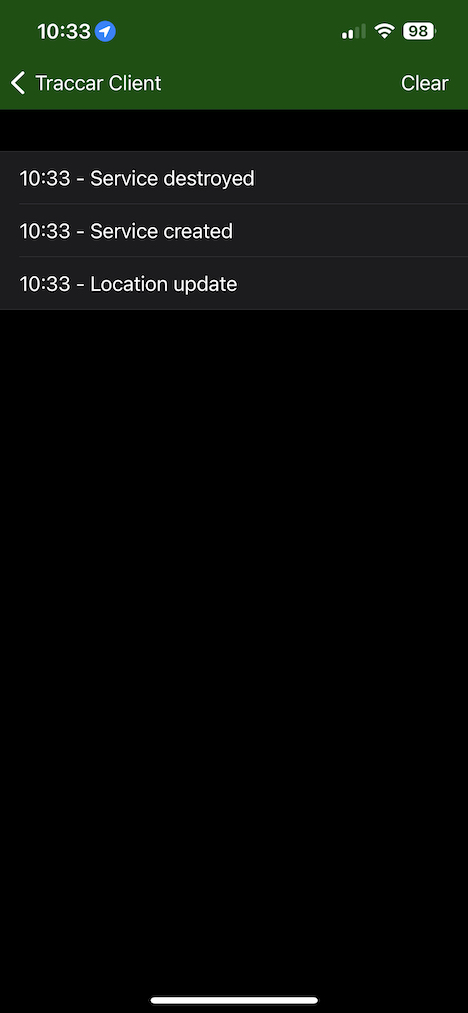
Back in the Traccar app on your phone, toggle the Service Status button to the On position. Your location will then be sent to the WxNotify Traccar server. To verify that it was sent properly, tap on "Status" in the upper right-hand corner. You should see a few messages that say "Service created" and "Location Update". If you see "Send Failed", please check to make sure you typed https://traccar.wxnotify.com for the Server URL and your phone is able to reach the Internet:
After a few minutes, you will receive an email from WxNotify that says a new Traccar Location was created for you! In the WxNotify dashboard, navigate to the Location page. You will see a location called "Traccar Device" that you can use when creating Alerts!
If you wish to discontinue using Traccar, navigate back to the Settings page and toggle the button to off next to "Use Traccar for dynamic locations using the following device ID", and then click Apply. The Traccar Client Location will then be removed. If you have an Alert using the "Traccar Client" Location, you will not be able to disable Traccar until the Alert is removed or modified to use a different Location.