Contacts

Jim Buitt
Last Update setahun yang lalu
WxNotify uses the term "Contact" to refer to how you want notified for an alert. WxNotify sends notifications using the following options or services:
* Discord chat message
* Email
* Pushover alert
* Slack chat message
* SMS text message (via SMS Gateway)
* SMS text message (via Twilio)
* Telegram chat message
Each service above will be discussed in further detail below.
Before a Contact can be used with an alert, it must first be confirmed. This is to ensure that you are allowed to receive messages at that Contact. Otherwise, you could send WxNotify notifications to anyone unchecked, which might make some people a bit unhappy. During Contact creation, WxNotify sends a 5-digit confirmation code to the Contact. You will then need to type this code in the next screen when it asks. If you do not enter the correct confirmation code within five (5) attempts, you will be locked out from further verification attempts for a short period of time. This security measure was added to prevent verification abuse.
Once a Contact has been created, you may send a test message to that Contact by clicking the "Send Test" button. The system will then send a test message to the recipient with the title "WxNotify - Test Message". Sending a test to Pushover Contacts will use the default Pushover sound. (sounds like a doorbell)
The WxNotify system does not allow Contacts to be edited, other than the its name. If you wish to have a Contact with a different type or destination, you will need to create a new Contact with the desired settings and then delete the old one.
WxNotify subscribers can create up to ten (10) Contacts. This allows subscribers to notify not only themselves, but also family and/or friends that would benefit from receiving severe weather alerts.
Discord
In order to use the Discord service, you will first need to create a free Discord account and set up a new server where you want WxNotify alerts to go. Once you have done that, setting up a Contact with Discord is a little technical, but it's pretty straightforward and doesn't take long at all. Discord contacts require the following information:
* Webhook URL
* Bot Name
To obtain the Webhook URL, create a new channel, or right-click on one of your existing channels and select "Edit Channel". In the menu on the left, choose "Integrations". On the right-hand side, click "Webhooks" and then click the "New Webhook" button. Enter a name for your webhook (e.g. "WxNotify") and choose the channel where you want alerts to go. Finally, click the "Copy Webhook URL" button to get its URL.
Now when you create a Contact using Discord, enter the webhook URL in the appropriate field. Next, enter the name you gave the webhook in the field next to Bot Name:
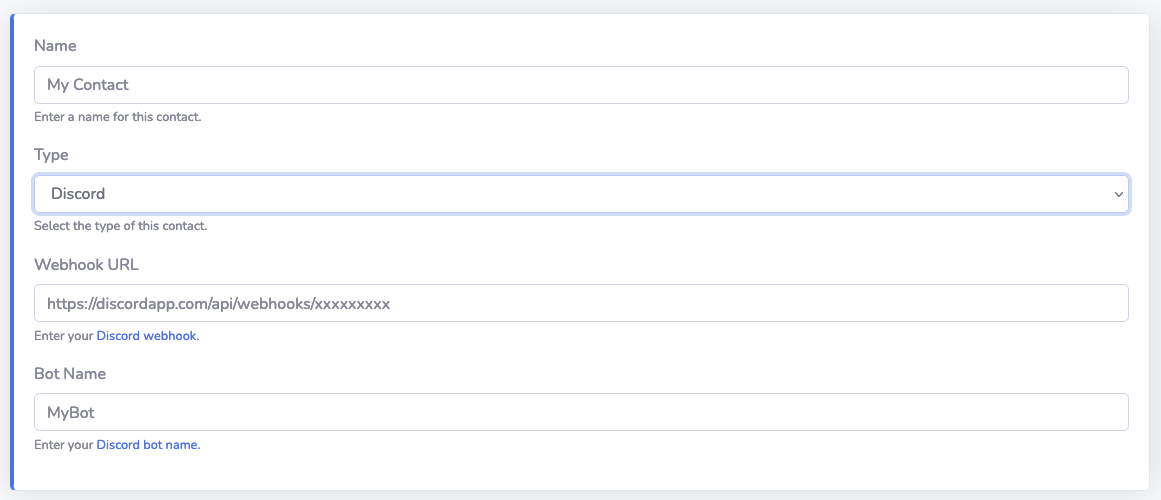
When receiving alerts from WxNotify using Discord, the full text of the alert will be included.
Using email with WxNotify is the simplest way of receiving alerts. All you need to supply is the email address where you want alerts to go:
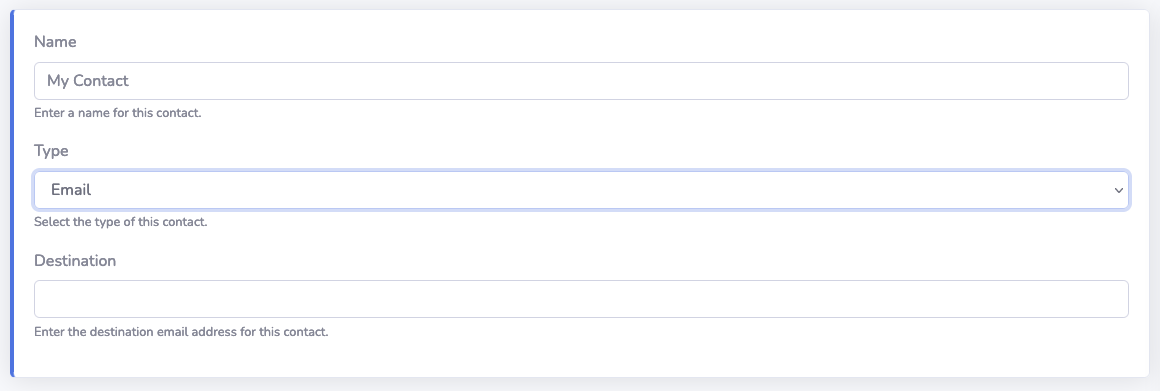
Unlike other types of Contacts like SMS or Telegram, Email alerts will contain the entire text of the alert product.
Pushover
When looking for new notification services to integrating with WxNotify, Pushover seemed like a natural fit. For a one-time cost of $5, you get a whole slew of features such as:
* Cross-platform alerting, including native desktop, iOS, and Android mobile apps,
* A large number of different alert sounds to choose from,
* Available libraries for support in just about any programming language,
* Multiple alert priorities, including "emergency" that keep alerting you until its confirmed, and
* Many more!
Before creating a Contact using Pushover, you will need to first create a Pushover account. You can do this directly from the iOS and Android mobile apps. After getting signed up, you'll need a couple pieces of information inside your Pushover dashboard. The first is your "User Key", which is displayed right on the main page. The second item is an "Application Token/Key". Towards the bottom of the Pushover dashboard, you'll see a section that says "Your Applications". Click the link that says "Create an Application/API Token". Enter the name of your application. (e.g. "WxNotify") You can also enter an optional description or URL and choose an icon to go with the application. Finally, click the checkbox to agree with Pushover's Terms of Service. Once you've created an Application, its Token/API key is displayed. You will use this when creating a new Contact using Pushover:
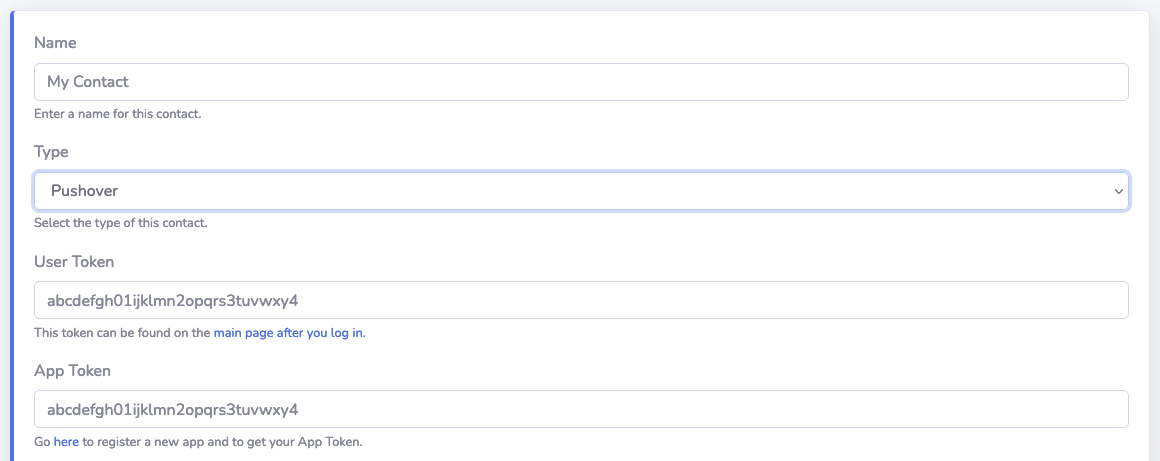
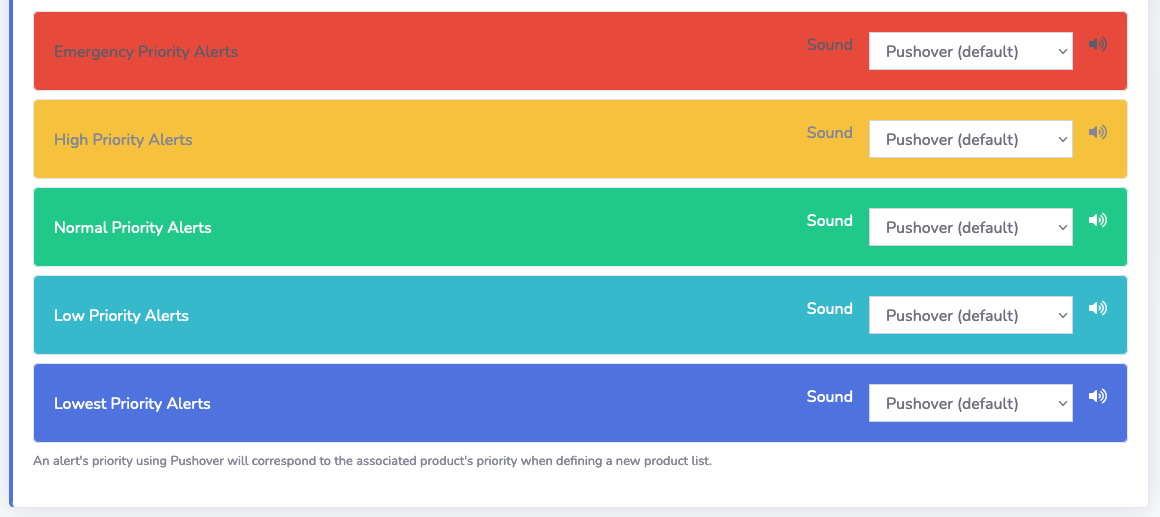
When receiving alerts from WxNotify using Pushover, the alert's title (e.g. "Severe Thunderstorm Warning for Cook Co., IL until 9:30pm CDT") is included along with the first 1024 characters of the product's text. The product's contents will be abbreviated to remove much of the unhelpful text. A link to view the full product on the WxNotify website is also included.
After entering your user and application token/API keys, you can choose sounds for each of the five (5) Pushover priorities. Click on the speaker button to play a sample of the sound in your browser so you'll know what it will sound like on your phone:
Slack
The popular team messaging service Slack can also be used as a destination for WxNotify alerts. Setting up your Slack workspace to receive WxNotify alerts is somewhat of an involved process, but still not too difficult. You'll need a Slack account in a workspace where you have Admin permissions, and/or a workspace that allows you to create Slack Apps.
Once you are logged into your Slack workspace, navigate here and click "Create New App" and click "From scratch". For App Name, you can call it something like WxNotify, though you can change this later. Next, select your workspace from the drop-down. Then, click "Create App":

You're then taken to the Slack App's settings page. From the menu on the left, click "OAuth & Permissions". Scroll down to the Scopes section. From there, you'll want to click the "Add an OAuth Scope" button under the Bot Token Scopes section. From the pop-up scroll down and select "chat:write":

Finally, you'll need to install the App to your Workspace. From the menu on the left, click "Install App". Then, click "Install to Workspace". Once the app is installed, click one more time on "Install App" from the menu. Your Bot User OAuth Token is then displayed. It should start with "xoxb-......". Click "Copy" to copy it to your clipboard. Now, back on WxNotify, you can create a new Slack Contact:

When receiving alerts from WxNotify using Slack, the full text of the alert will be included.
SMS (via SMS Gateway)
WxNotify has recently changed how it sends SMS text messages. Prior to the new launch of the WxNotify service in the fall of 2021, all SMS text messages were sent using the service Twilio. While individual text messages cost a fraction of a penny, the cost to send many SMS texts does add up. Over time, this cost became financially unfeasible to continue supporting without charging its subscribers. Most of the popular cell phone carriers offer a free SMS Gateway to its subscribers, which use a special email address to forward messages to a cell phone by SMS text message. These email addresses usually resemble the format [email protected]. Messages sent through an SMS Gateway can take on average several seconds longer to receive than direct SMS to SMS messaging.
Please note that SMS Gateways are known to be an unreliable messaging method, therefore you should avoid using it for potentially life-threatening notifications, such as Tornado Warnings.
You may create a SMS Gateway Contact by entering your cell phone number and then choosing your cell carrier from the drop-down list. Your cell carrier's email will automatically be entered for you:

I have provided many of the popular cell carriers, however if your cell carrier is not listed, please let me know, and I will investigate whether or not it can be added.
Twilio
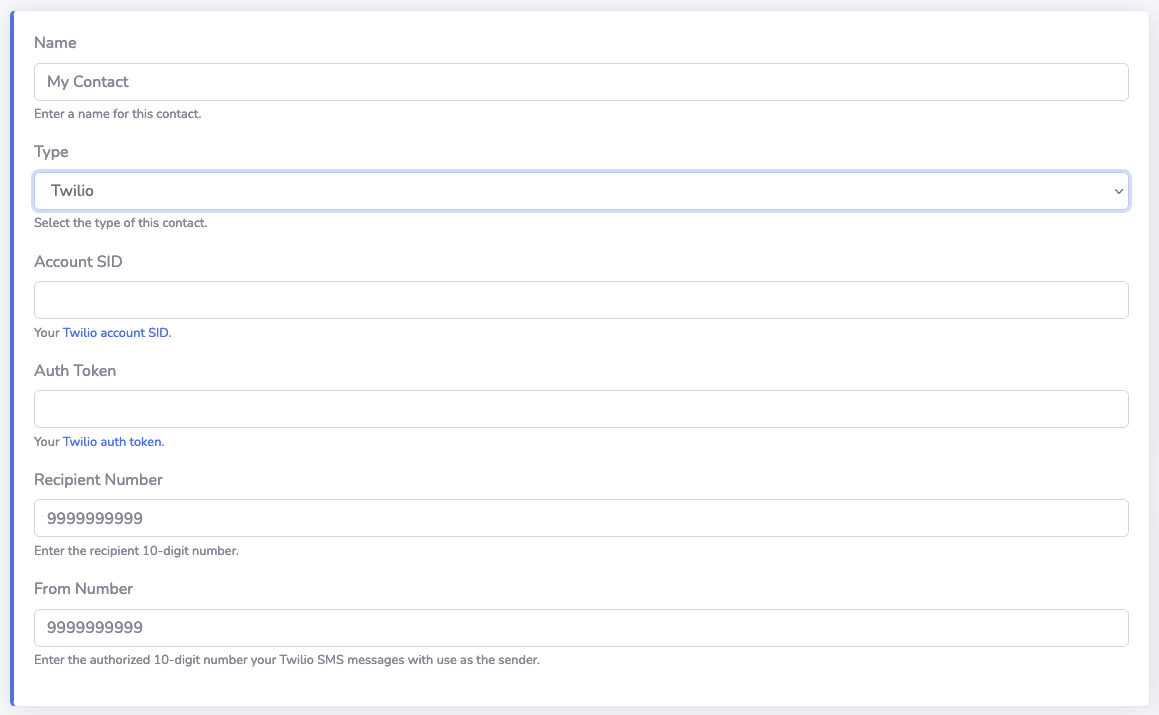
You can still receive SMS text messages using the service Twilio, however you will now need to provide your own Twilio account information. Besides having a Twilio account, you'll need the following pieces of information to set up a new Contact using Twilio:
* Account SID
* Auth Token
* Recipient Number (what number alerts should go to)
* From Number (what number alerts should come from)
All of this information can be obtained from your Twilio dashboard after logging in. The From number can be the number that is automatically assigned when you create your account, or you can use a number (i.e., CID) that you purchase through the Twilio service:
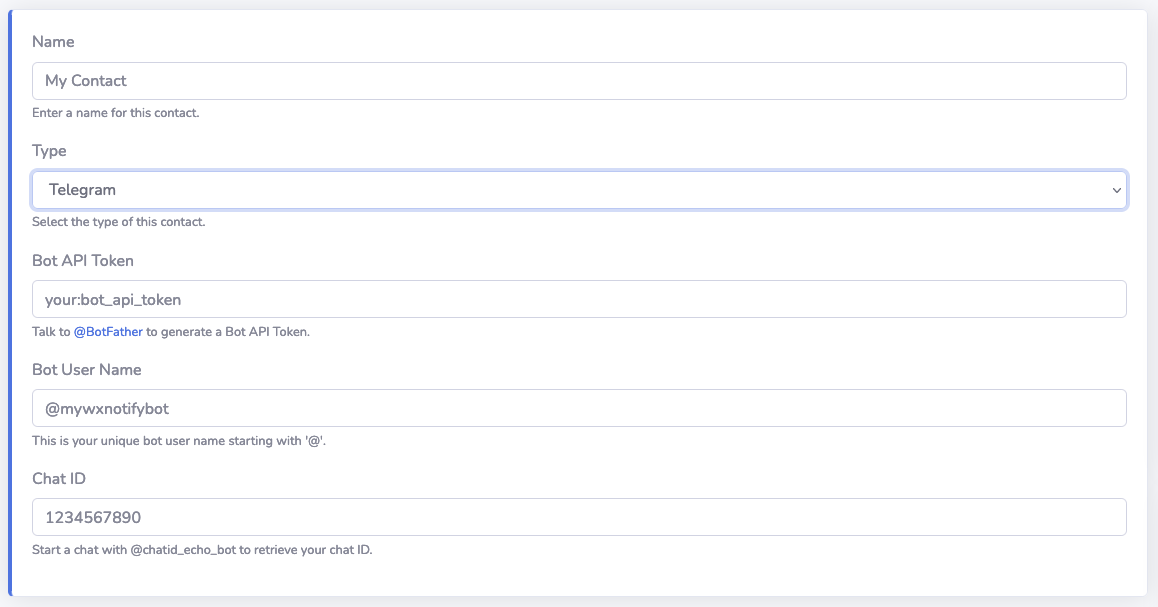
Telegram
The popular messaging app Telegram is also a new choice when creating a Contact. Setting up Telegram to receive WxNotify alerts is probably the most involved of all of the Contact options, but it's still not terribly difficult for non-technical users.
The process involves creating a new "bot" before you can use it for sending WxNotify alerts. The Telegram documentation outlines exactly what you need to do to create a bot, but in a nutshell, you'll need to do the following:
1. After creating a Telegram account, (you can do this from within the mobile app) you'll need to start a new chat with the user "@BotFather".
2. Use the "/newbot" command to tell @BotFather to create a new bot. @BotFather will ask a series of questions for setting up your new bot. One of the questions is what name you want to give your bot. Remember this answer as you'll need it later when creating a Telegram Contact.
3. Once the bot is created, it will print out the bot token. You'll need to remember this value this as well. You'll want to treat this token like a password, as it should never be shared with anyone else.
4. You'll also need to get your Chat ID of the conversation where you'll be receiving WxNotify alerts. You can obtain this by creating a new group chat with the user @RawDataBot. It will echo out the group ID and your ID. You can use what it says for your ID as your Chat ID.
Once you have all the above information, you can create a new Telegram Contact: